
Dresser Turned TV Console

I have been on a mission to find an efficient, yet beautiful way to display my Television and hide all the things that come along with it. I liked the idea of using a dresser, so the next step was just to find the right one at the right price. I went to a local flea market and found this for $30.

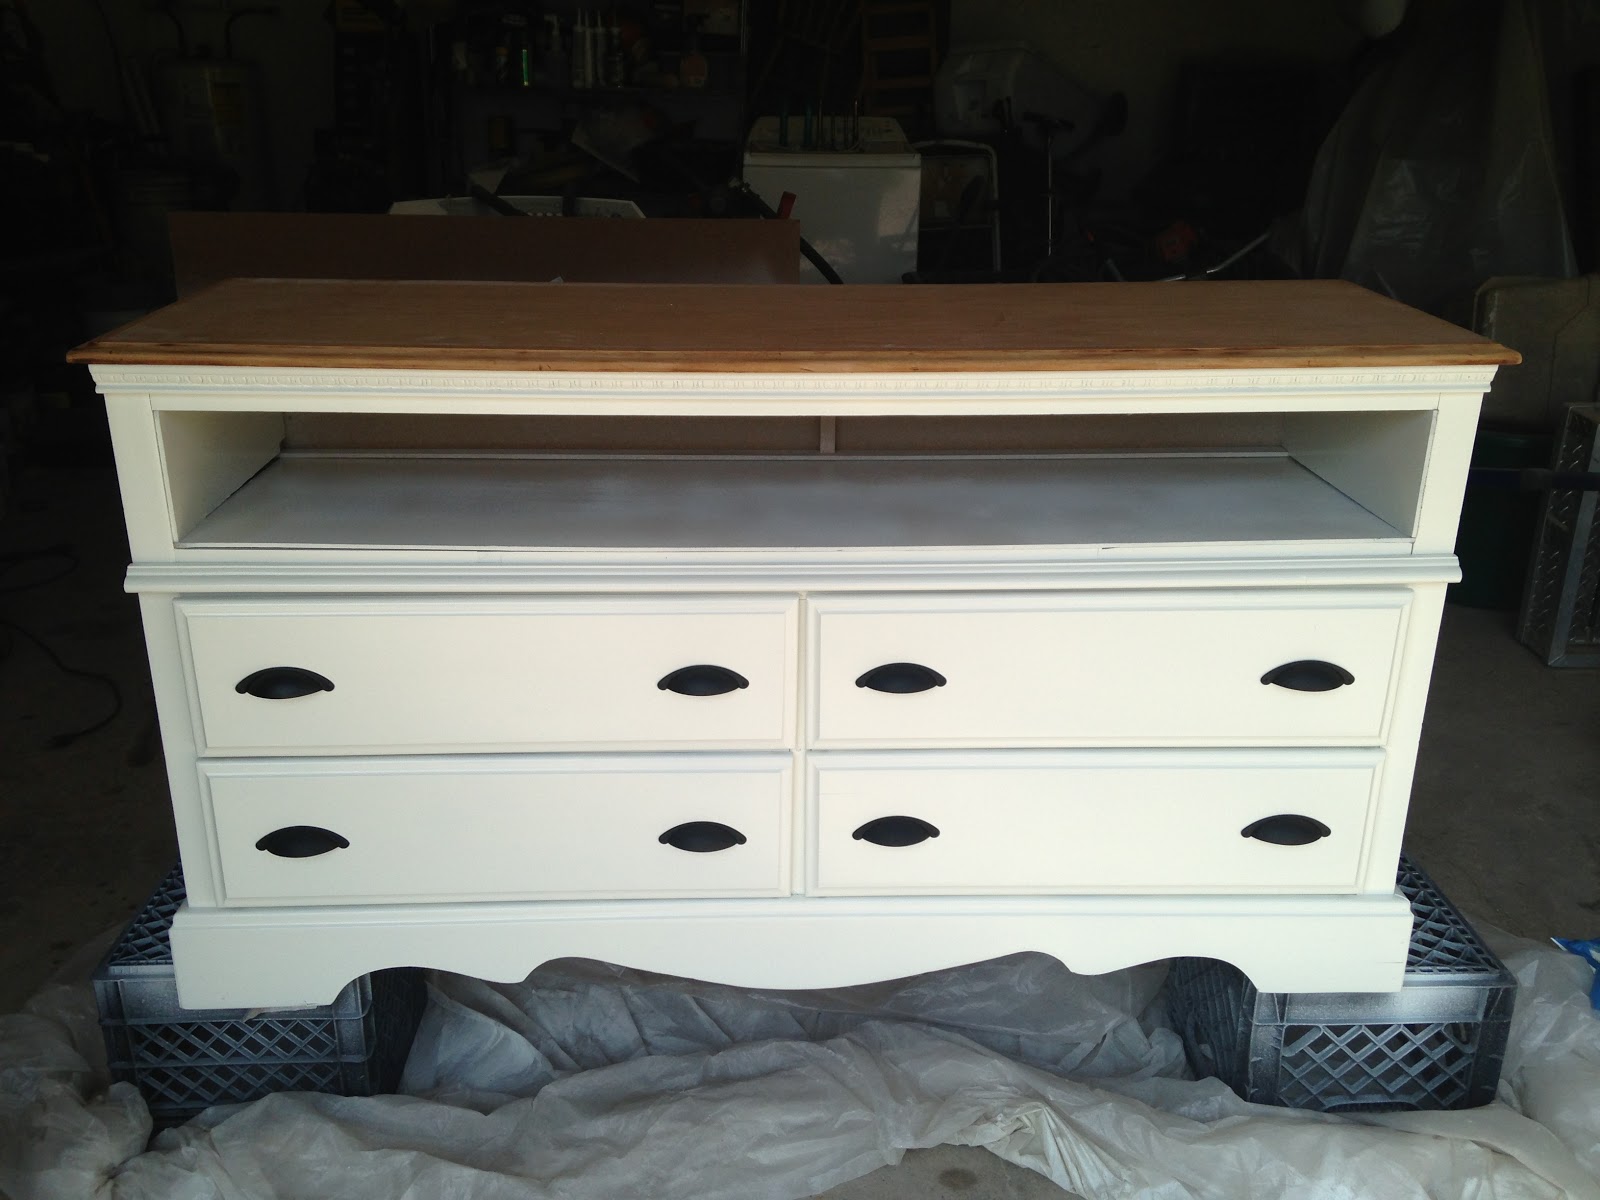
I soon learned that my dresser was not exactly well made, actually it was falling apart. luckily I wasn't using all of the drawers so I was able to take parts from the unused pieces to make it functional again.
I decided to sand the top and paint the bottom part. so that's where I started, I also sanded the body and drawers just enough to clean it up and create a rough surface for the primer.


Once the dresser was sanded and cleaned well (dusted and whipped down) I primed it using Kilz original primer. You can use the spray version or the paint version, both work great and create a smooth surface. I used two coats, sanding between each coat with 220 grit sand paper.


I used a paint sprayer to apply the oil based Behr paint in Pot of Cream. I'm so happy with the color! It's not too warm or cool, it looks clean but isn't blinding white either. I will definitely use this color again!
I was also in the process of cutting out the pieces for the shelf. We cut out a piece for the bottom, sides, and back so that it looked nice. I primed and painted those the same as the dresser. I did have help cutting the pieces out, and it was much more challenging than I had expected.
The next step was to stain the top! I used Minwax Dark Walnut. I ended up doing three coats and then applied a three coats of a satin polyurethane.
P.S. The handles are from Home Depot.

Once shelf pieces were glued down with liquid nails I used stainable wood filler in any little cracks or spaces and did some touch up paint on top of that. If I could do it again, I would probably have installed all of the shelving before I painted the dresser. Oh well, lessons learned. (:
We drilled three 1 1/4" holes in the back as low as possible for the cords, so you can't see any of them!
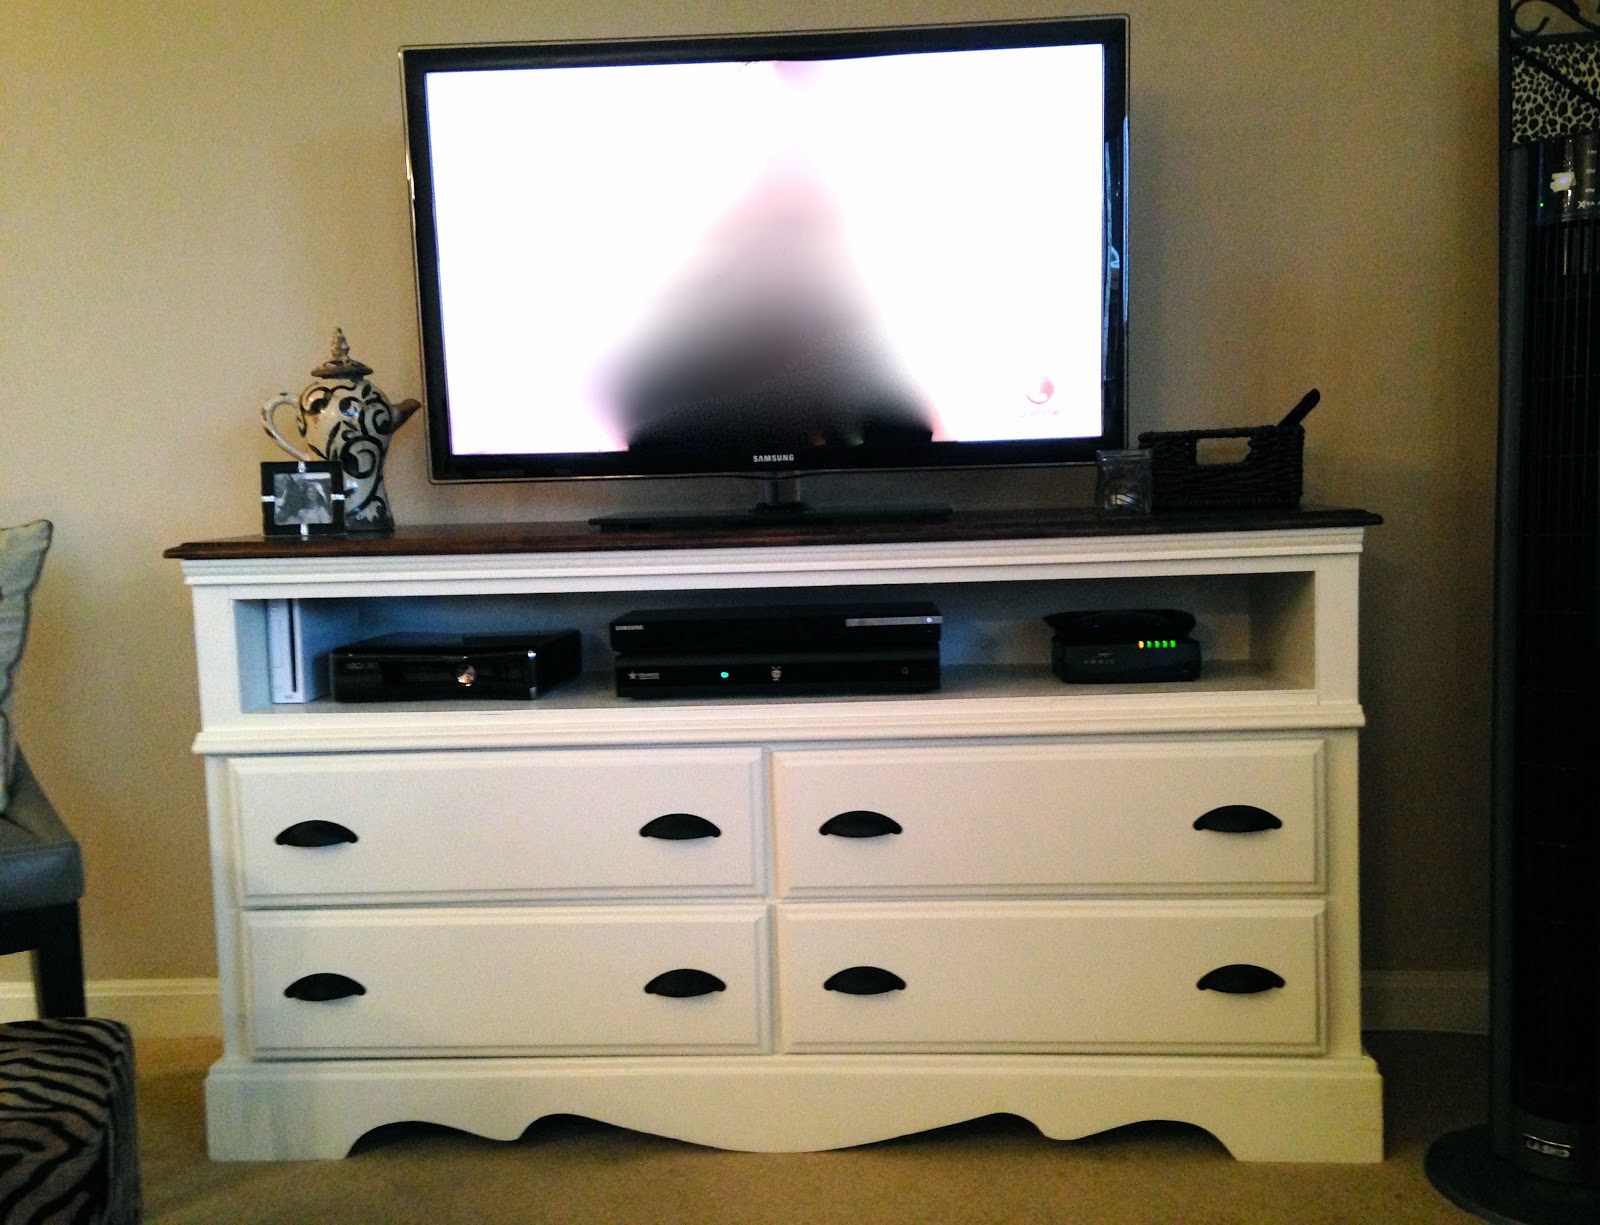
My DVD's all fit in one drawer! It's amazing how little space that they take up when they are lined up so nicely.

Thank's for looking! There will be more to come!
♥ Kaylee
.
